Monday's From a Marketing Perspective will not be brought to you today. Instead I bring you part 2 of creating landing tabs on your Facebook Page. If you missed it, here's part one.
(From a marketing perspective - having a landing tab is an ideal choice for your Facebook author page or book page. So technically, I could still call this FAMP.)
By now you should have created two images for your Facebook page: one for non-fans and one for fans. Now let's go install the app itself.
- From your Facebook page, click on your profile image.
- Click on the button that says "Add Profile Picture"
- Click on select image and upload the image you want your fans to see (the second image). You can change this back later.
- The picture you want your fans to see should, now be your profile picture. Click "View Page".
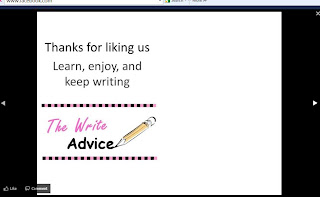
- Click on your profile picture again. And then again so you are looking at your image like the image on the right.
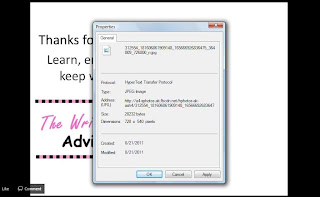
- From here, right click on your picture and select "properties". This doesn't work in Google Chrome, by the way. I did it in Internet Explorer. You should get a box that looks like this:


7. Do you see that long bunch of mumbo jumbo after the word "Address" in the picture above? You need to copy that address and paste it somewhere until later. Make sure you copy the whole thing. It should start with http and end in jpg. Mine looks like this: http://a4.sphotos.ak.fbcdn.net/hphotos-ak-ash4/312554_181606861909148_165666926836475_364009_726800_n.jpg
You can now put your Facebook profile picture back to what you had it as before if you would like.
8. From Facebook, search for Iframe Apps or click on the link here. There are many apps that will make a landing tab, but this is the easiest as far as I'm concerned.
9. Select to add the app to your page. If you have several pages, you'll need to choose which page to add it to. Your page should look like this:
10. In that big white box, copy and paste the code that follows in red:
<style type='text/css'>
#wrapper {
width:520px;
height:500px;
margin:0 auto; border:0; padding:0;
position:relative;
}
</style>
<div id="wrapper">
<div style='width:520px;'>
<img src='COPY YOUR PICTURE ADDRESS IN PLACE OF THESE GREEN WORDS' />
</div>
</div>
11. In place of the green font you should paste that address I told you to get earlier from your profile picture.
12. Almost done! Click on fan gate.
13. Upload your non-fan picture. This is the image you want people to see if they have not liked your page yet.
14. Click the box "Enable fan gate".
15. Go back to your Facebook page and click "Edit Page".
16. About a third down on this page you should see the words "Default Landing Tab". Select "Welcome".
17. Hit save and you're done!
You won't be able to test your page yourself because you are an Admin to your Facebook Page. You can log out of Facebook entirely and then search for your page and you should see your non-fan page image.
Whew, that was a lot of steps. I promise I won't get this technical on Facebook again. But now you have a great Facebook app that authors usually only get when they have a publisher designing their FB page. Aren't you super cool now?
Did I lose you? Please ask any questions in the comments below.


2 comments:
Useful information, Laura. And no, you didn't lose me.
Thank goodness!
Post a Comment
I love hearing from you! You can choose to comment as a guest or use any of the other login options available after you hit "Post As". Thanks for contributing to the conversation :)